hexo下文章的排版如何优化:宽度,字体,图片大小
图片太大
自定义url,默认的是/发表日期/标题
加载太慢了>>>第三方cdn加速
更新了文章,发表时间也没更新
升级hexo主题
第三方工具:
搜狐的畅言开放评论
leancloud阅读次数
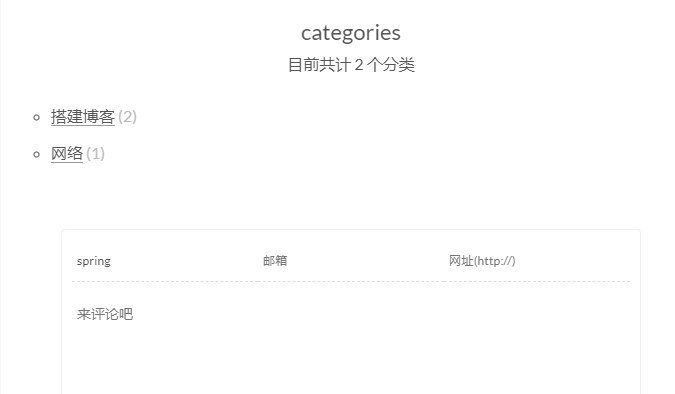
1.设置标签、分类的界面
设置菜单那里,我设置了显示标签、分类、关于几个选项。但是点击进去,却报错:404

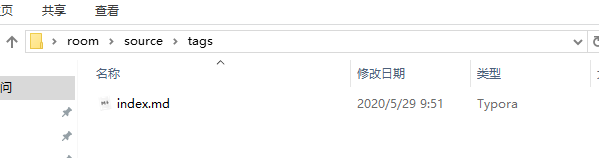
只需要在source 目录下创建文件即可
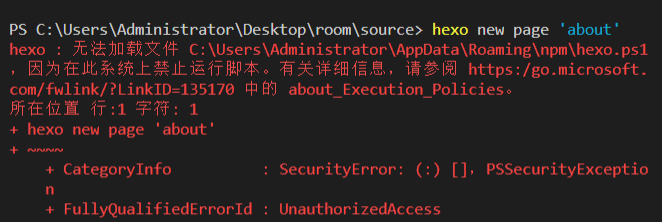
1 | hexo new page 'about'(tags/categories) |
有时候在vscode终端/powershell 创建报错,需要用git bash创建
修改这tags和categories文件夹中的index.md文件,新增type属性,如下:
1 | title: tags |
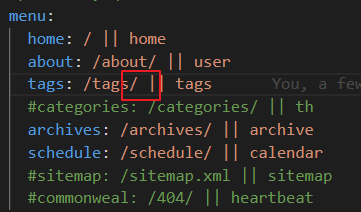
修改好,还是报404,url出现 %20,空格的意思
theme下面的配置文件,||之前出现了空格,删除空格即可
2. 实现点击出现桃心效果
在themes/hexo-theme-next/source/js/src下新建文件 clicklove.js ,接着把该链接下的代码拷贝粘贴到 clicklove.js 文件中。
代码如下:
!function(e,t,a){function n(){c(".heart{width: 10px;height: 10px;position: fixed;background: #f00;transform: rotate(45deg);-webkit-transform: rotate(45deg);-moz-transform: rotate(45deg);}.heart:after,.heart:before{content: '';width: inherit;height: inherit;background: inherit;border-radius: 50%;-webkit-border-radius: 50%;-moz-border-radius: 50%;position: fixed;}.heart:after{top: -5px;}.heart:before{left: -5px;}"),o(),r()}function r(){for(var e=0;e<d.length;e++)d[e].alpha<=0?(t.body.removeChild(d[e].el),d.splice(e,1)):(d[e].y--,d[e].scale+=.004,d[e].alpha-=.013,d[e].el.style.cssText="left:"+d[e].x+"px;top:"+d[e].y+"px;opacity:"+d[e].alpha+";transform:scale("+d[e].scale+","+d[e].scale+") rotate(45deg);background:"+d[e].color+";z-index:99999");requestAnimationFrame(r)}function o(){var t="function"==typeof e.onclick&&e.onclick;e.onclick=function(e){t&&t(),i(e)}}function i(e){var a=t.createElement("div");a.className="heart",d.push({el:a,x:e.clientX-5,y:e.clientY-5,scale:1,alpha:1,color:s()}),t.body.appendChild(a)}function c(e){var a=t.createElement("style");a.type="text/css";try{a.appendChild(t.createTextNode(e))}catch(t){a.styleSheet.cssText=e}t.getElementsByTagName("head")[0].appendChild(a)}function s(){return"rgb("+(255*Math.random())+","+(255Math.random())+","+~~(255Math.random())+")"}var d=[];e.requestAnimationFrame=function(){return e.requestAnimationFrame||e.webkitRequestAnimationFrame||e.mozRequestAnimationFrame||e.oRequestAnimationFrame||e.msRequestAnimationFrame||function(e){setTimeout(e,1e3/60)}}(),n()}(window,document);
<!--2-->
3. 设置网站的图标Favicon
在EasyIcon中找一张(32*32)的ico图标,或者去别的网站下载或者制作,并将图标名称改为favicon.ico,然后把图标放在/themes/hexo-theme-next/source/images里,并且修改主题配置文件:
1 | favicon: |
只需要把images目录下
1 | favicon-16x16-next.png文件和 |
4. 添加顶部加载条
5.阅读次数/热度
使用leancloud实现,enable属性改为true
“阅读次数”这些字也可以改
next主题集成leanCloud,打开\blog-generator\themes\hexo-theme-next/layout/_macro/post.swig,在画红线的区域添加℃。
然后打开,\blog-generator\themes\hexo-theme-next/languages/zh-Hans.yml,将画红框的改为热度就可以了
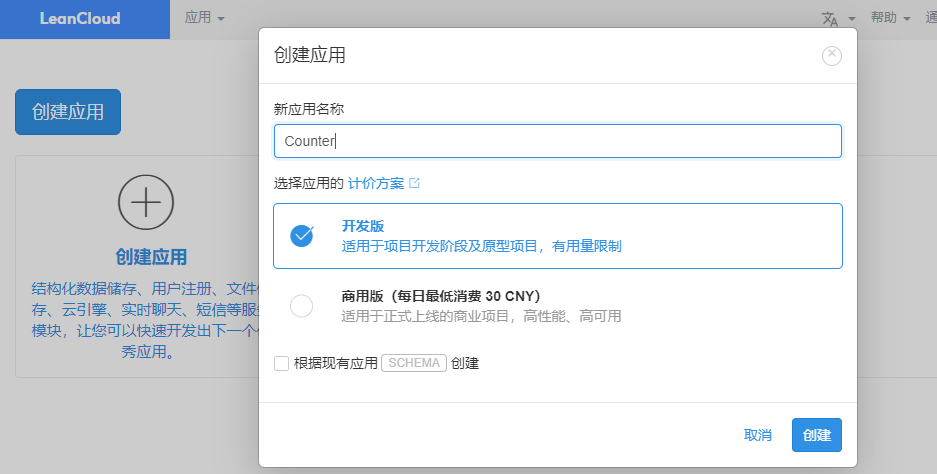
创建应用:控制台 -> 创建应用(开发版)
应用名称可以随意输入,后面还可以修改,我用的是 test;
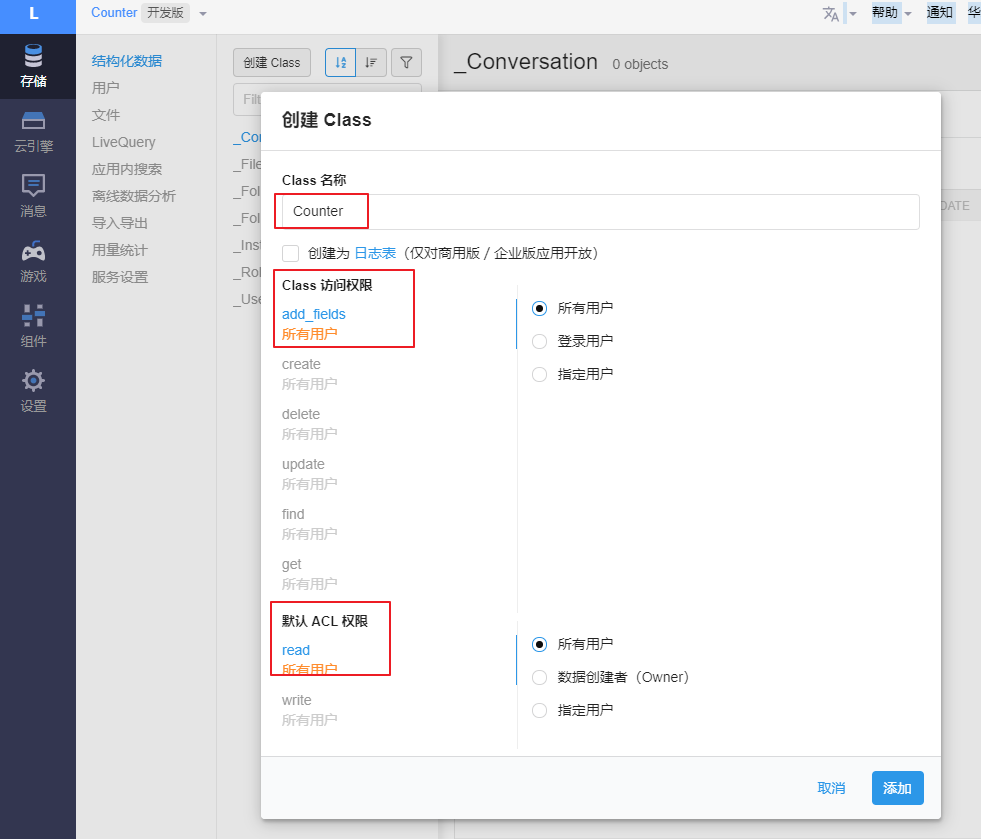
创建 Class:点击刚创建的 test 应用,创建一个 Class 表用来保存我们的博客访问数据。
此处创建的 Class 名字必须为 Counter,用来保证与 NexT 主题的修改相兼容;
ACL 权限选择 无限制,避免后续因为权限的问题导致次数统计显示不正常
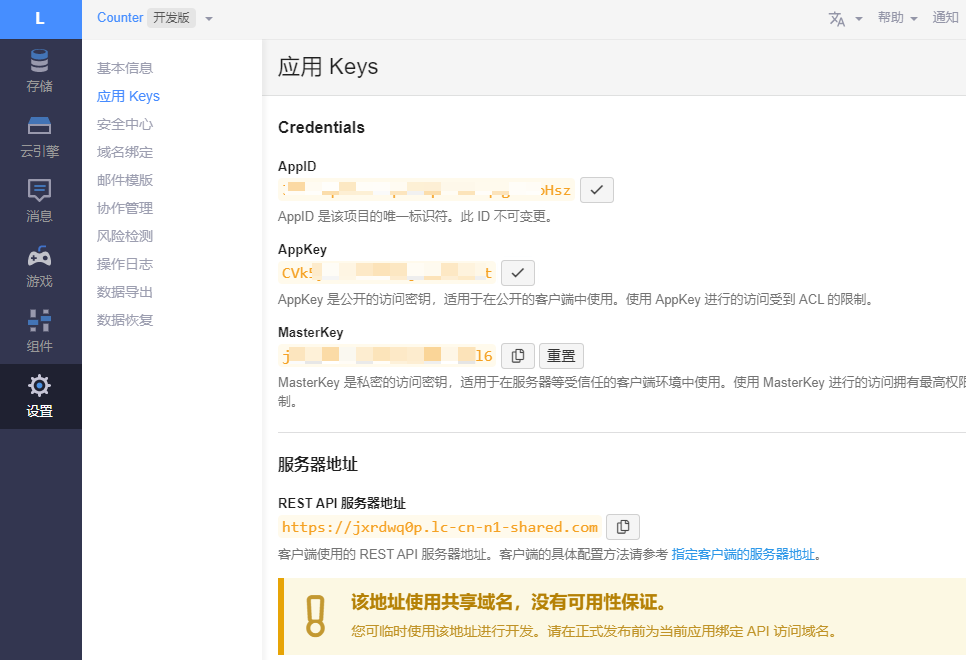
1 | leancloud_visitors: |
进文章详情可以看到阅读次数
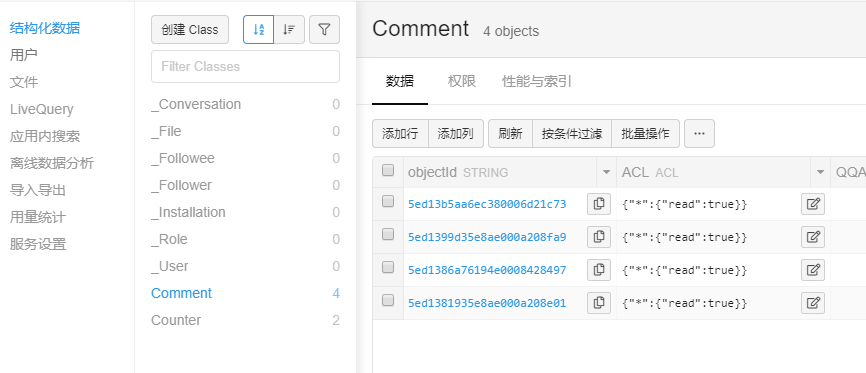
6.评论功能(valine)
也用到leancloud,用同一个appid和appkey。而且只用创建一个Class,当你开启了valine,自动加载了一个Comment 的Class
7. 阅读全文
两种方法:
1 打开主题配置文件_config.yml,ctrl + F搜索找到”auto_excerpt”,改为true
1 | auto_excerpt: |
2 在post每篇文章使用< !--more--> 手动进行截断

8. 上传头像,并设置头像旋转效果
设置头像:
打开themes/next/_config.yml找到avatar: /images/avatar.gif;
其中images文件在themes/next\source\中,将你的头像图片放到images中,一般默认
命名为avatar,记得改下后缀就可以了.
设置旋转效果:
打开themes\next\source\css\_common\components\sidebar\sidebar-author.styl,
全部替换为下列代码
1 | .site-author-image { |
9. 分类和标签设置
1、创建“分类”选项
1.1 生成“分类”页并添加tpye属性
打开命令行,进入博客所在文件夹。执行命令
1 | $ hexo new page categories |
根据上面的路径,找到index.md这个文件,打开后默认内容是这样的:
1 | --- |
添加type: "categories"到内容中,添加后是这样的:
1 | --- |
1.2 给文章添加“categories”属性
打开需要添加分类的文章,在为其添加categories属性。下方的categories: web前端表示添加这篇文章到“web前端”这个分类。注意:hexo一篇文章只能属于一个分类,也就是说如果在“- web前端”下方添加“-xxx”,hexo不会产生两个分类,而是把分类嵌套(即该文章属于 “- web前端”下的 “-xxx ”分类)。
用---创建前页,title和date没写就按默认的
1 | --- |
至此,成功给文章添加分类,点击首页的“分类”可以看到该分类下的所有文章。当然,只有添加了categories: xxx的文章才会被收录到首页的“分类”中。
2、创建“标签”选项
2.1 生成“标签”页并添加tpye属性
1 | $ hexo new page tags |
1 | -- |
添加type: "tags"到内容中,添加后是这样的:
1 | --- |
2.2 给文章添加“tags”属性
打开需要添加标签的文章,为其添加tags属性。下方的tags:下方的- jQuery - 表格 - 表单验证就是这篇文章的标签了
1 | --- |
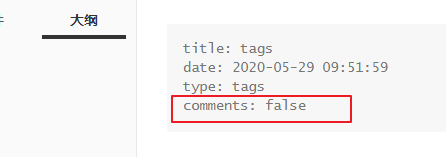
10.标签和分类界面不需要评论
在tags/about 等的index.md文件加入comments:false
11.联系我
12.调整页面宽度xxx
13.搜索功能
先安装插件:
1 | npm install hexo-generator-searchdb --save |
之后先在站点配置里末尾增加以下代码:
1 | search: |
再在主题配置文件里搜索找到 local_search修改为如下:修改为true
预览:

14.给代码块添加复制功能/代码高亮
下载 clipboard.js
三方插件 clipboardjs ,相关介绍和兼容性我就不赘述了,去它主页或github上看。
下载地址:
保存文件clipboard.js / clipboard.min.js ,目录如下:.\themes\next\source\js\src
clipboardjs 使用
也是在.\themes\next\source\js\src目录下,创建clipboard-use.js,文件内容如下:
1 | /*页面载入完成后,创建复制按钮*/ !function (e, t, a) { /* code */ var initCopyCode = function(){ var copyHtml = ''; copyHtml += '<button class="btn-copy" data-clipboard-snippet="">'; //fa fa-globe可以去字体库替换自己想要的图标copyHtml += ' <i class="fa fa-clipboard"></i><span>copy</span>'; copyHtml += '</button>'; $(".highlight .code pre").before(copyHtml); new ClipboardJS('.btn-copy', { target: function(trigger) { return trigger.nextElementSibling; } }); } initCopyCode(); }(window, document); |
在.\themes\next\source\css\_custom\custom.styl样式文件中添加下面代码:
1 | //代码块复制按钮.highlight{ //方便copy代码按钮(btn-copy)的定位 position: relative;}.btn-copy { display: inline-block; cursor: pointer; background-color: #eee; background-image: linear-gradient(#fcfcfc,#eee); border: 1px solid #d5d5d5; border-radius: 3px; -webkit-user-select: none; -moz-user-select: none; -ms-user-select: none; user-select: none; -webkit-appearance: none; font-size: 13px; font-weight: 700; line-height: 20px; color: #333; -webkit-transition: opacity .3s ease-in-out; -o-transition: opacity .3s ease-in-out; transition: opacity .3s ease-in-out; padding: 2px 6px; position: absolute; right: 5px; top: 5px; opacity: 0;}.btn-copy span { margin-left: 5px;}.highlight:hover .btn-copy{ opacity: 1;} |
引用
在.\themes\next\layout\_layout.swig文件中,添加引用
1 | <!-- 代码块复制功能 --><script type="text/javascript" src="/js/src/clipboard.min.js"></script> <script type="text/javascript" src="/js/src/clipboard-use.js"></script> |
设置完这个copy比较丑,而且在左上角,需要调整一下
16.打赏
修改打赏字体不闪动xxx

修改文件 next/source/css/_common/components/post/post-reward.styl,然后注释其中的函数 wechat:hover 和 alipay:hover ,如下:
1 | * 注释文字闪动函数 |
16.侧边栏设置
17.设置文章更新时间,不仅仅有发表时间
18.修改主题页面布局为圆角
修改主题页面为圆角,有两种方法:
第一种:
打开文件,路径:/themes/next/source/css/_variables/custom.styl,粘贴如下代码:
1 | // 修改主题页面布局为圆角 |
第二种:
打开文件,路径:\themes\next\source\css_variables\Gemini.styl ,添加以下代码:
1 | // 修改主题页面布局为圆角 |
19.去掉顶部黑线
打开文件,路径:themes\next\source\css_custom\custom.styl ,添加以下代码:
1 | //去掉顶部黑线: |
20.修改文章底部#为图标
我们正常写的文章,如果有标签的话会在文章末尾出现标签。像这样:
#不好看,把它换为图标
打开文件,路径:/themes/next/layout/_macro/post.swig 搜索找到 rel=”tag”># 把#替换为如下代码:
1 | <i class="fa fa-tag"></i> |

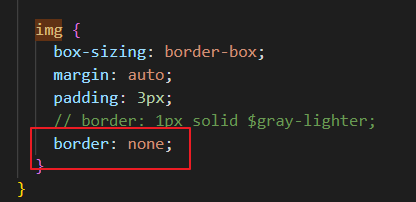
21.去掉文章中图片默认的边框xxx
打开文件,
/themes/next/source/css/_common/components/post/post-expand.styl,找到img,把border修改为none
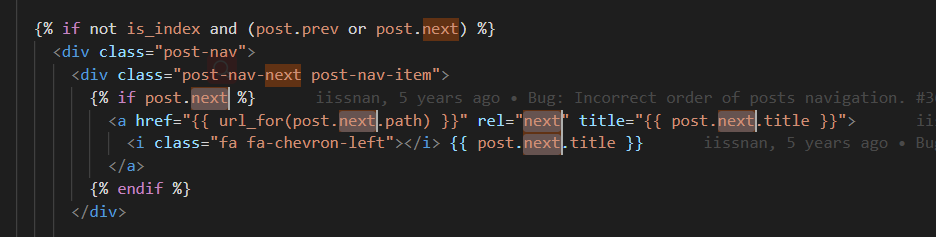
22.更改上一篇,下一篇的顺序
进入一篇文章,在文章底部,有上下篇的链接(< >),但是点 > 发现进入的是页面中的的上面那篇文章,与操作习惯不符,别扭。
1 | <!-- 文件位置:~/blog/themes/next/layout/_macro/post.swig --> |
把后面五个next改为prev,prev改为next